 Last updated: August 14, 2024 at 12:46 PM
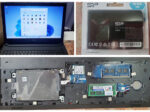
I purchased a used laptop computer, DELL Latitude 3510, on Yahoo! Auctions, but I noticed that there were burn marks (pressure marks?) on the LCD screen, as shown in the gallery below.
If I had noticed it sooner, I would have returned it, but since quite a few days have passed, I gave up on returning it and decided to replace the LCD panel myself. At the same time, he will increase the memory from 8GB to 16GB.
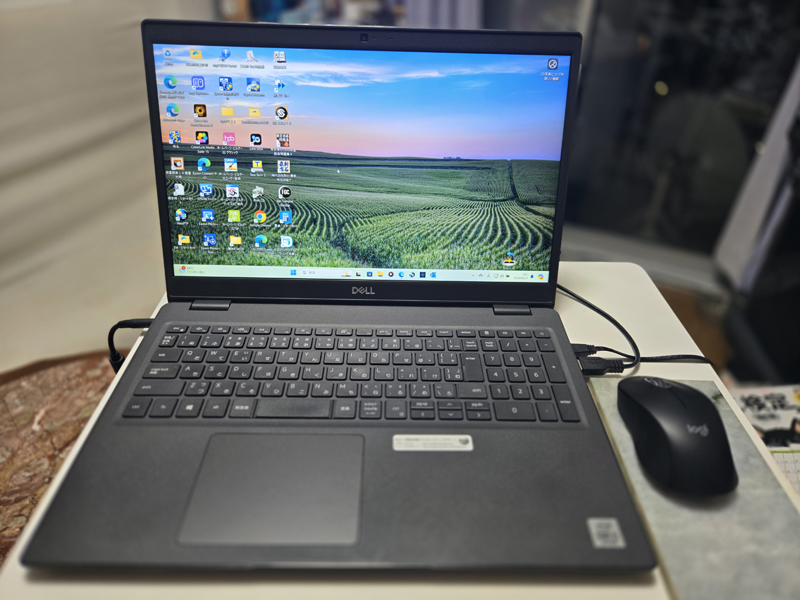
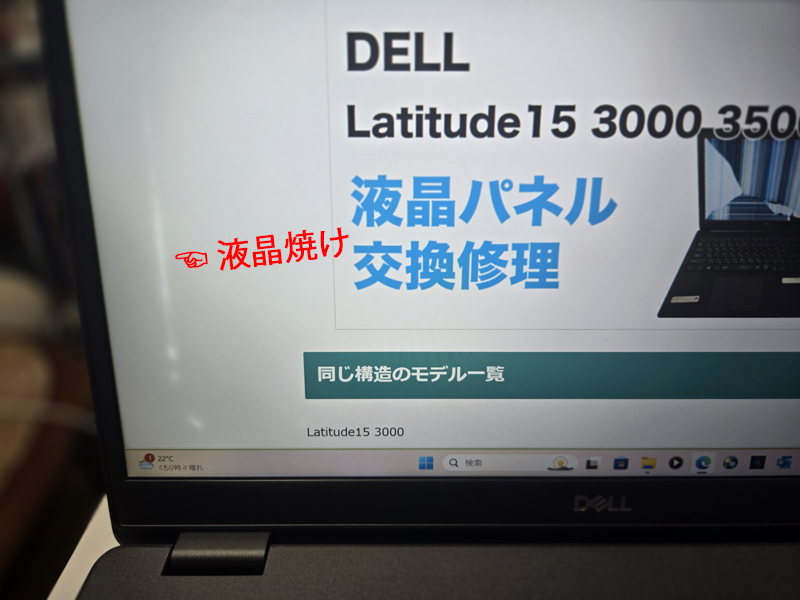
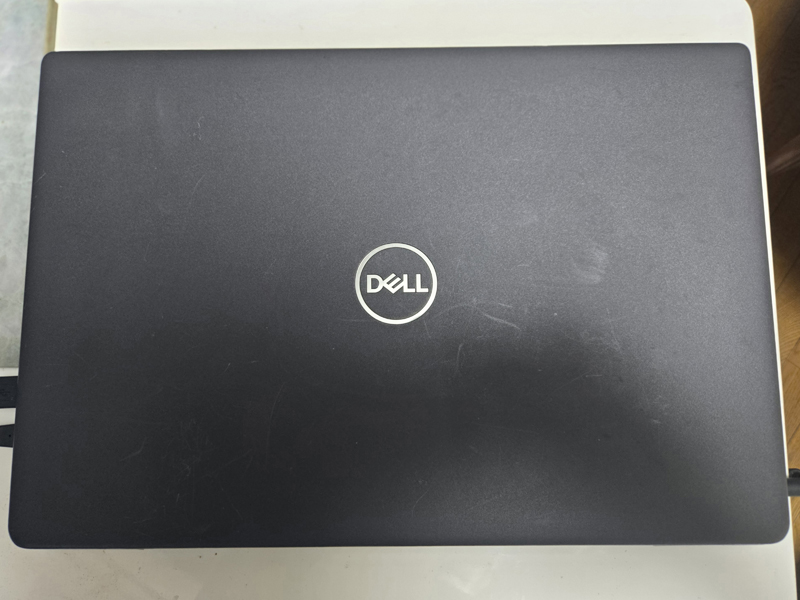
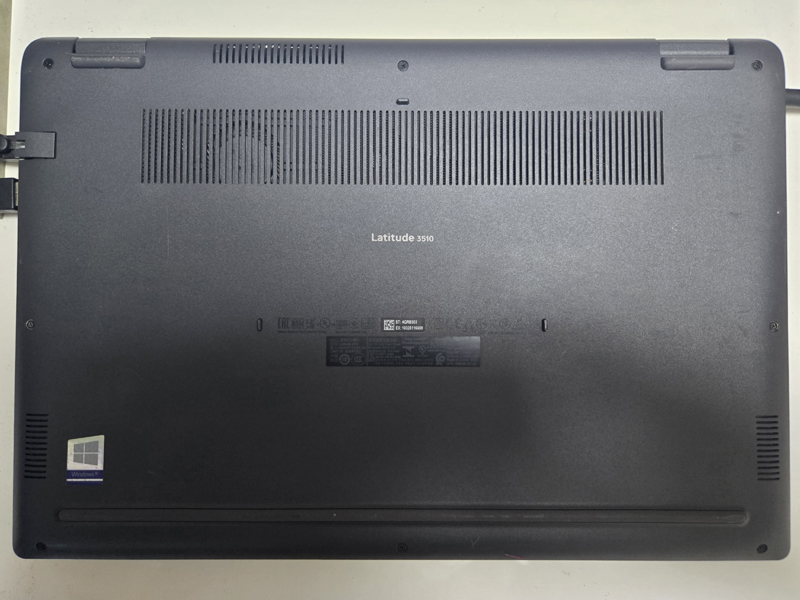
(Model name ‘P101F001’ can be confirmed)
The specifications of this machine are as follows.
Laptop Windows11 Used High Spec Dell Latitude 3510 15.6 inch 10th Generation Core i5 SSD512GB Memory 8GB Camera 10 Keys
<Manufacturer> DELL
<Model number> ... Latitude 15 3510 (P101F)
< OS > ・・・ Windows 11 Pro 64bit
<CPU>・・・Core i5 (10210U) – 1.6GHz (6M power, maximum 4.20 GHz)
<Memory>...8GB
< SSD > ・・・ 512GB
<Graphics>...Intel UHD Graphics
<Resolution>...1920×1080
<Display> 15.6
Pre-prepared tools and parts
The tools and parts prepared in advance for the work are shown in the gallery below. In this example, we prepared a 10 mm wide (transparent) double-sided tape for the tool, but since the display bezel has very narrow widths, we recommend using 3 mm wide double-sided tape (black) for repairing LED screens. recommend to.
Actually, if I used transparent double-sided tape, the gap between the bezels would look whitish and the border with the LCD wouldn't fit properly, so I replaced the bezel with black double-sided tape later!
Actually, I replaced it three times and finally got the hang of it 🤦♀️
tool
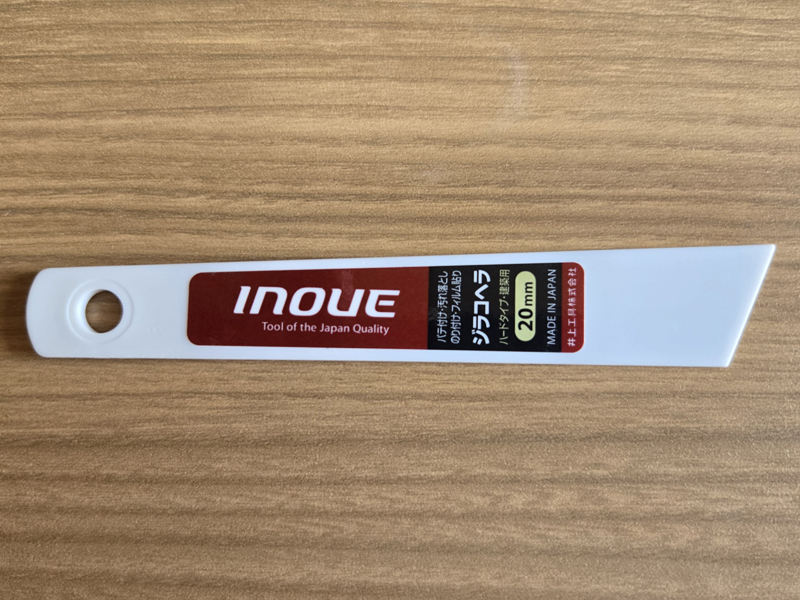
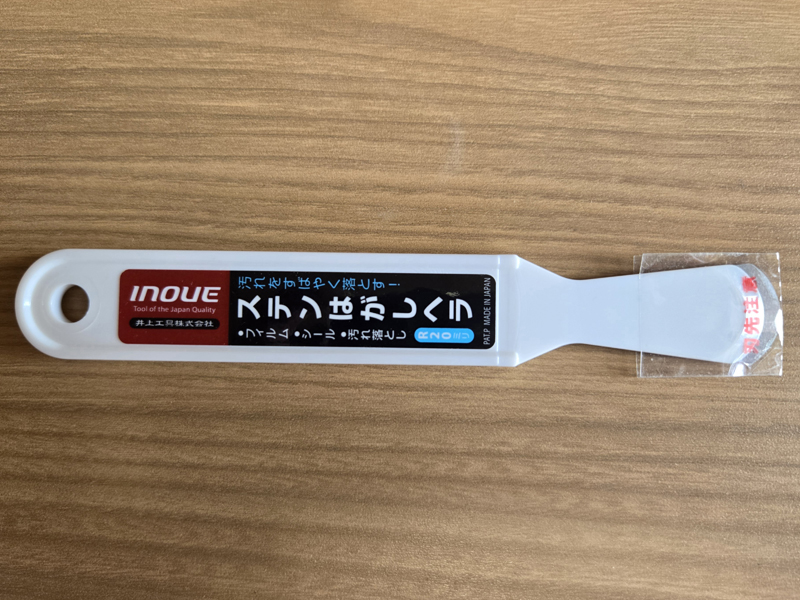
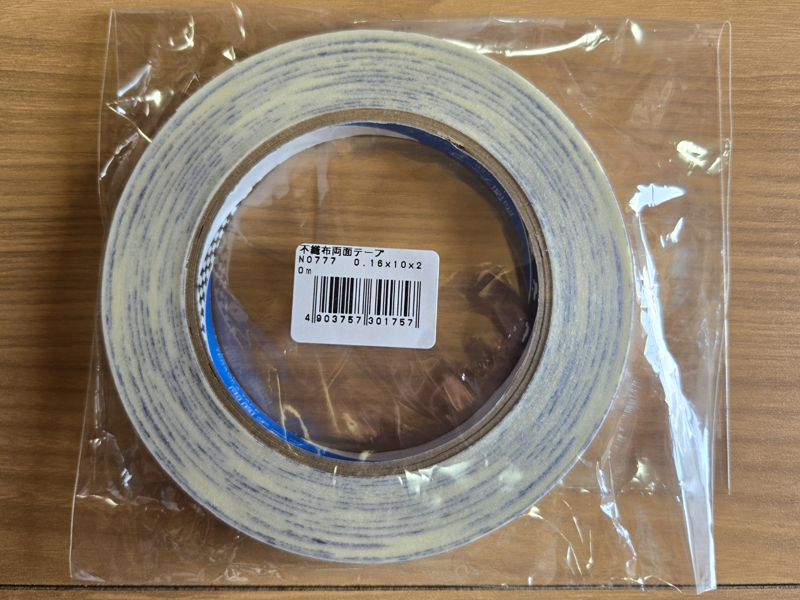
Thickness 0.16mm x Width 10mm x Length 20m… Amazon : 731 yen
⇒ JnTech LED screen repair double-sided tape (black) 1mm 2mm 3 mm 50m long, 3 pieces, 1 pair of tweezers included… Amazon: 899 yen
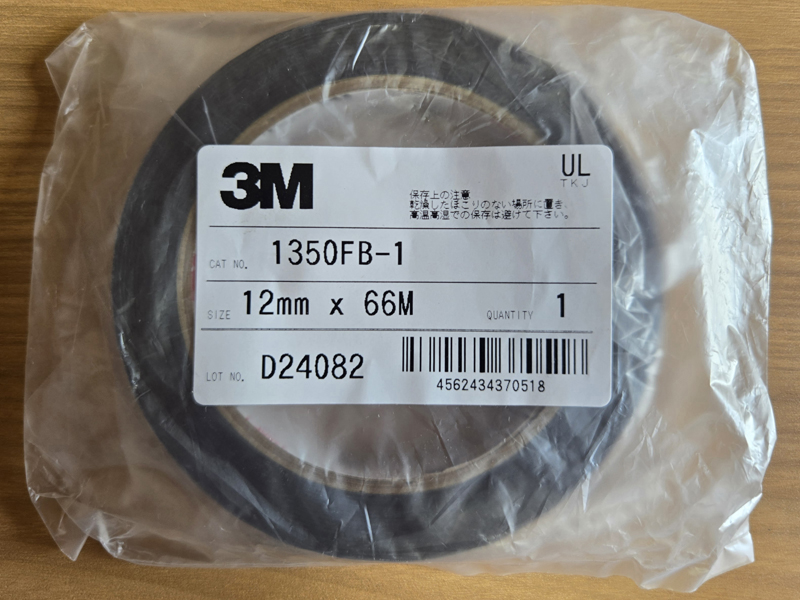
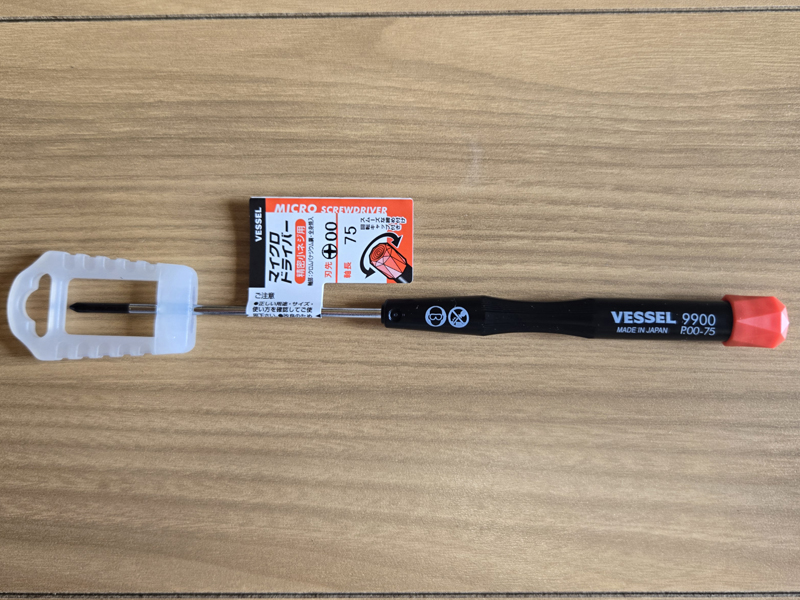
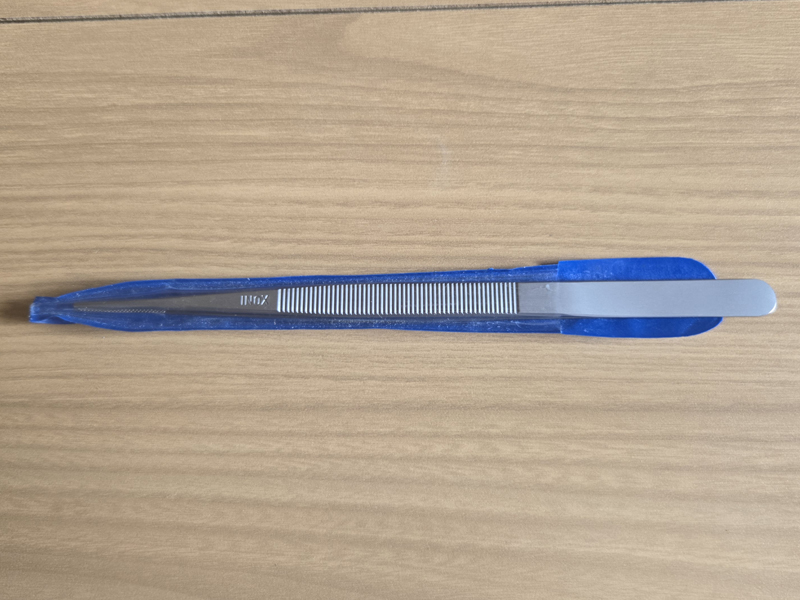
parts
LCD panel replacement and memory expansion
Replacing the LCD panel and adding memory requires special tools.
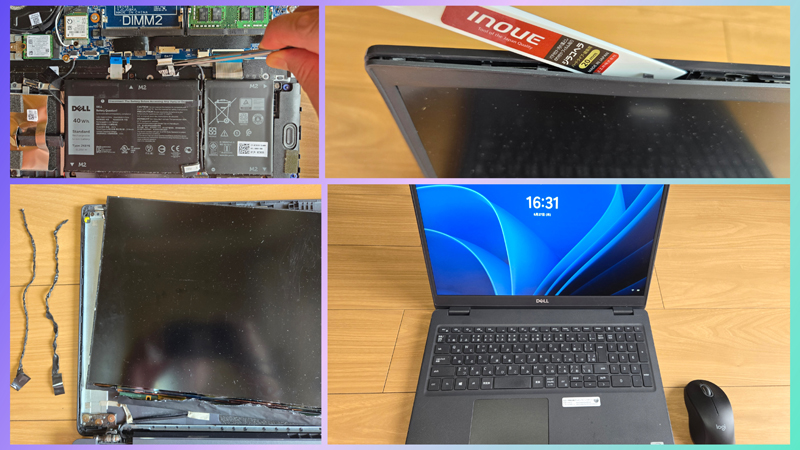
First, remove the back cover of the main unit, unplug the power cable, and install the memory. Next, carefully remove the display bezel and replace the LCD panel.
The following sites were used as reference for this work.
Details of the process are shown in the gallery below.
Preparation in advance
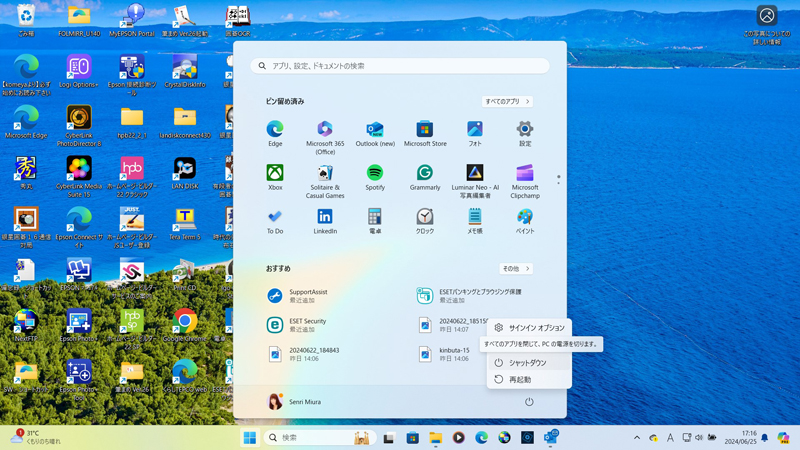
Follow the steps below to prepare for the work you are about to do.
procedure
- Save and close any open files and exit any running applications.
- Shut down your PC.Start>Power>Shut down Click .
Note: If you are using another operating system, please refer to your operating system's documentation on how to shut down. - Unplug your PC and any attached devices.
- Disconnect all attached network devices and peripherals from your PC, such as your keyboard, mouse, and monitor.
- Remove all media cards and optical disks from your PC (if installed).
- Place the PC face down.
- For the next step, touch the water faucet to discharge static electricity from your body.
Removing the base cover
Follow the steps below to remove the base cover of the main unit.
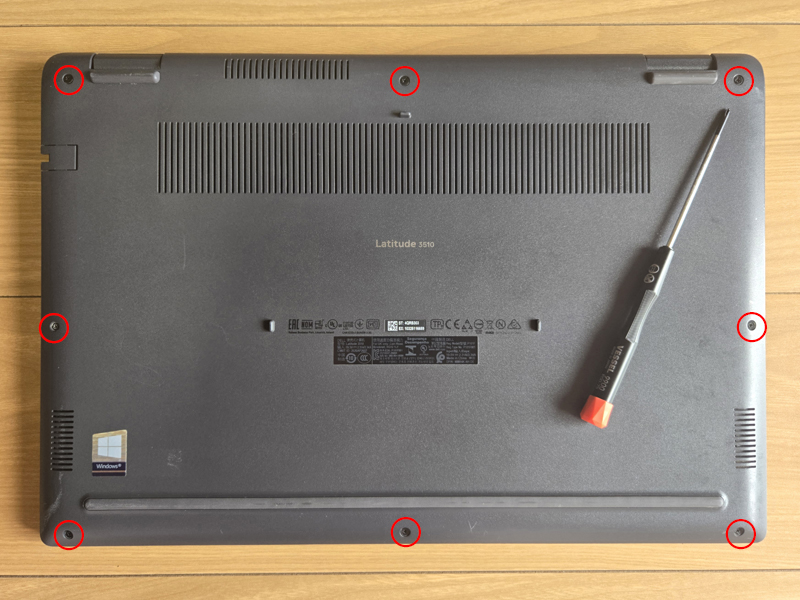
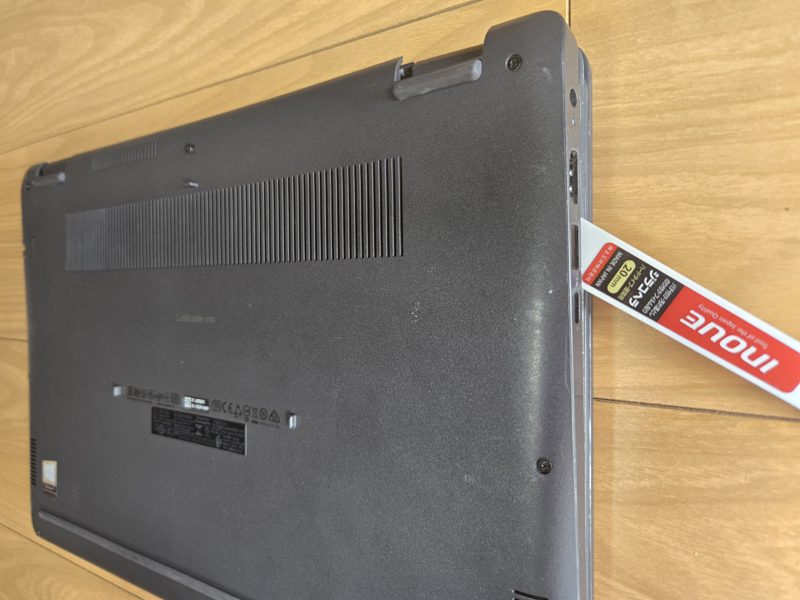
1. Loosen the screw (circled in red) on the back of the main unit with a micro screwdriver. This screw cannot be removed.
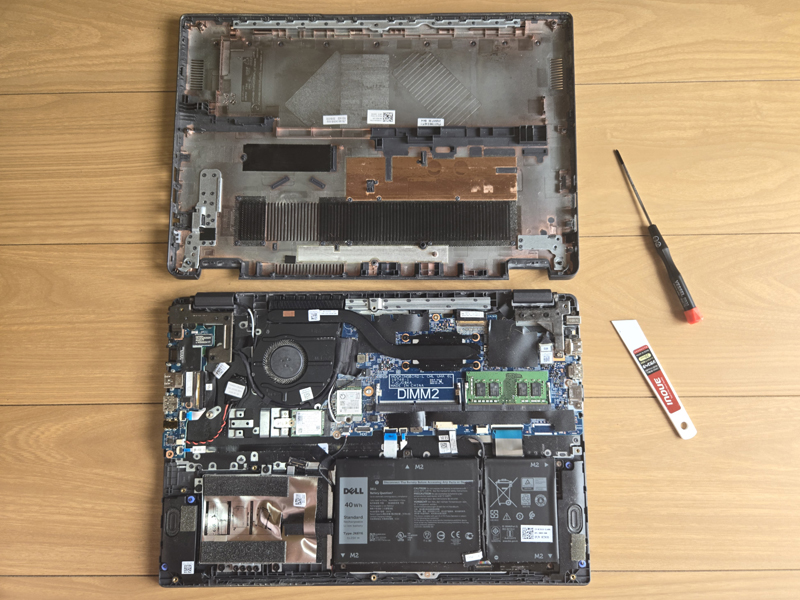
2. Insert the jirako spatula into the gap in the base cover, and carefully remove the cover by slowly pulling it around the entire circumference with your fingertips.
Removing the battery
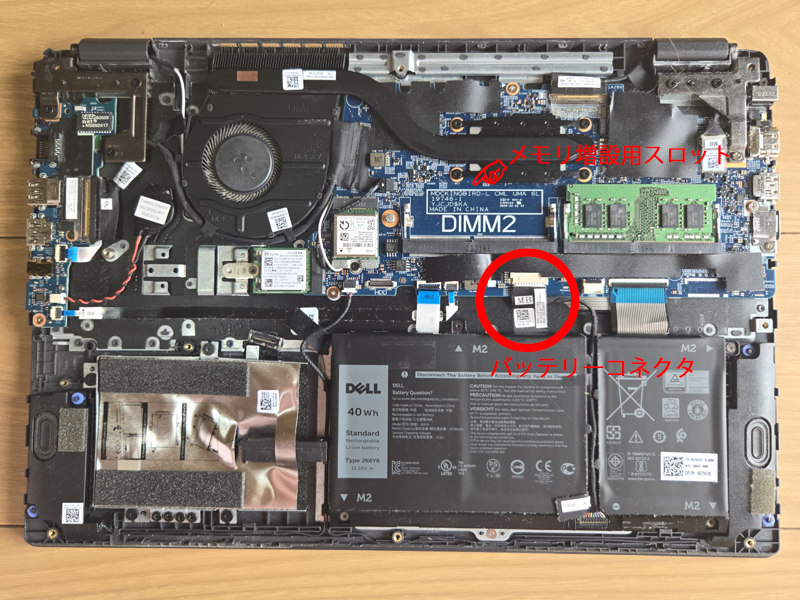
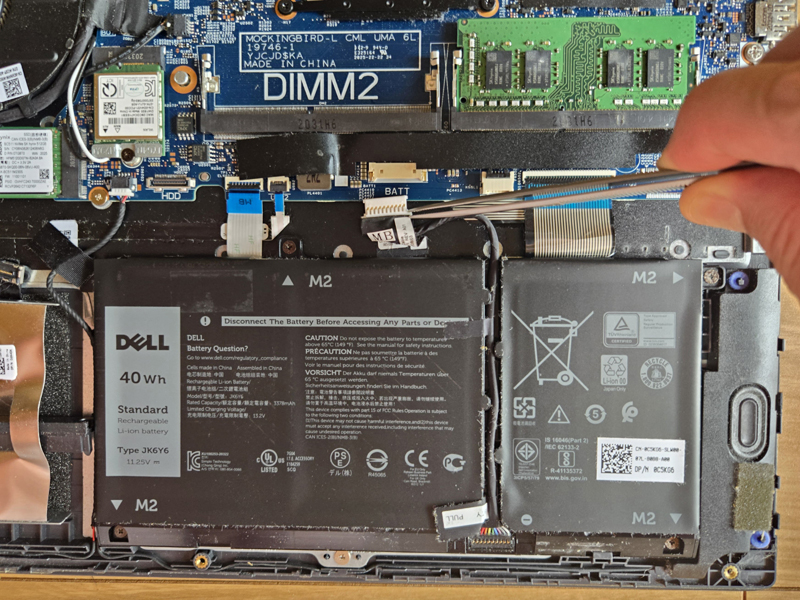
Unplug the battery power cable connector with tweezers. This process must be performed. Otherwise, the electronic circuit will be shorted during subsequent operations.
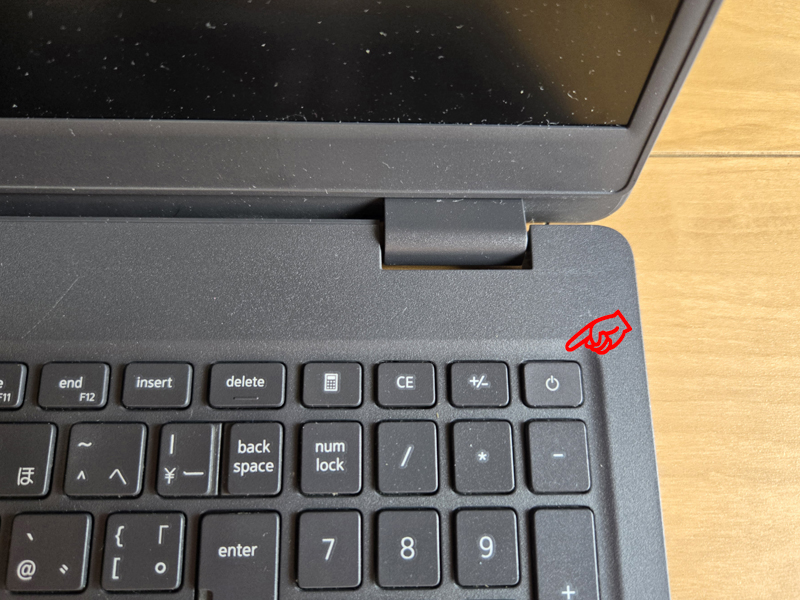
After unplugging the power cable, press and hold the power button for 5 seconds to discharge static electricity from the system board.
Once you have finished discharging the static electricity, use a handy cleaner to suck up the dust and clean the board. Especially, there is a lot of dust around the cooling fan.
Adding memory
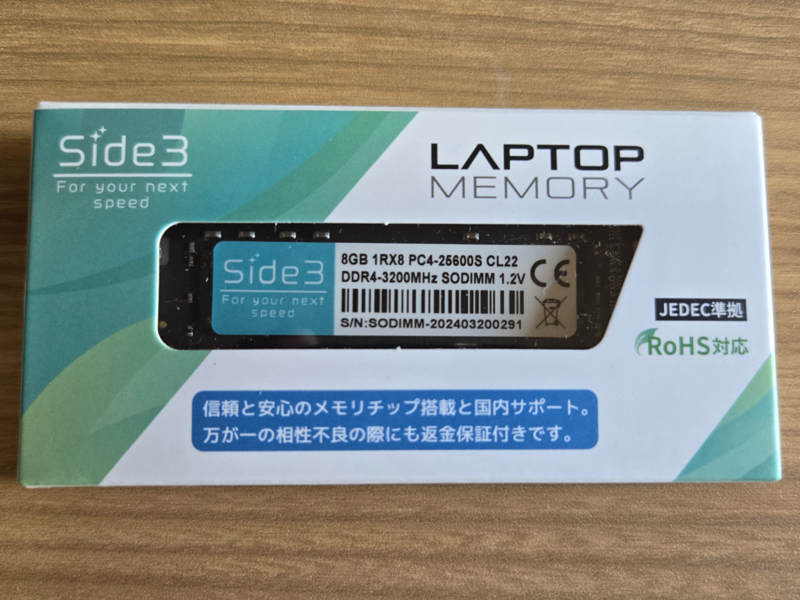
Add 8GB of SO-DIMM memory to a DELL Latitude 3510 laptop purchased from Amazon for a total memory configuration of 16MB.
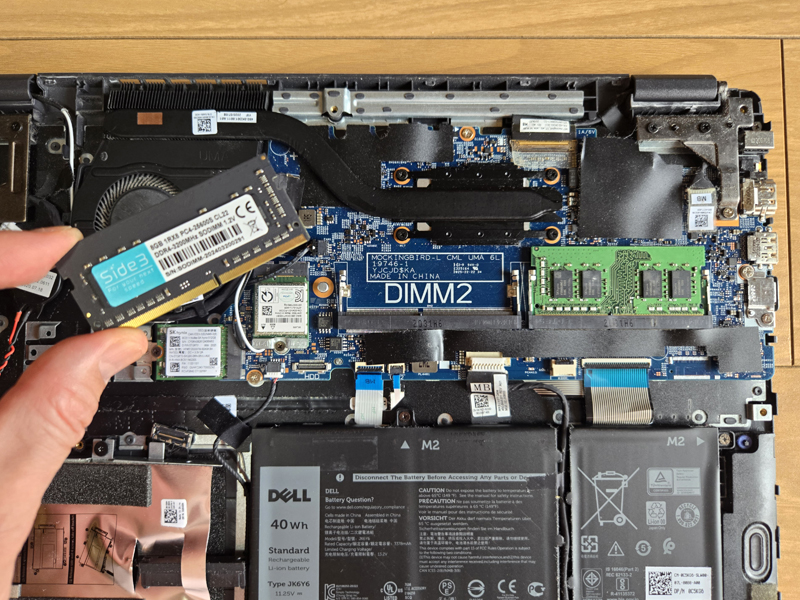
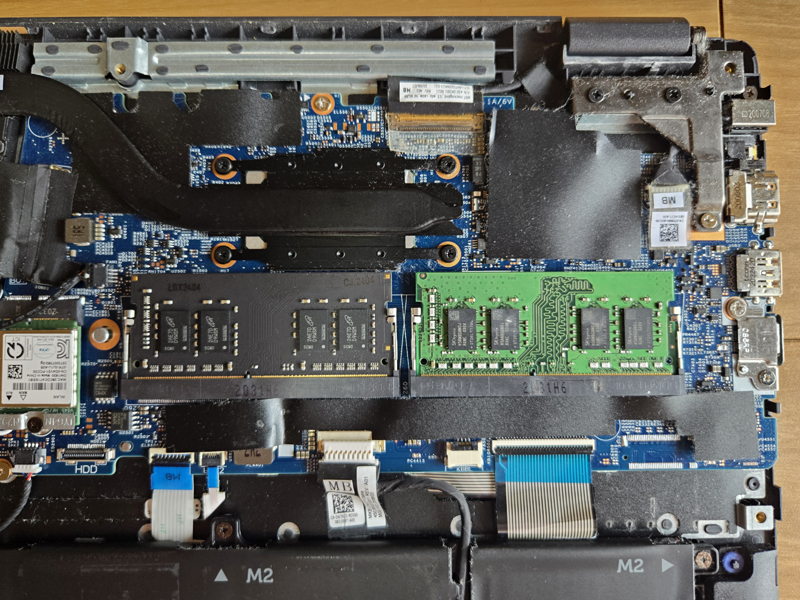
The specifications of this memory are as follows.
The memory standard is DDR4-3200, but due to backward compatibility, it also supports the Latitude 3510's memory standard DDR4-2666/PC4-21300 (2400 MHz/2667 MHz).
Side3 DELL Expansion Laptop Memory DDR4-3200MHz Inspiron Latitude Compatible PC4-25600 (8GB)
¥3,280
About this product
Memory for notebook PC, memory standard: DDR4-3200 (PC4-25600) SO-DIMM, memory capacity: 8GBThis is memory of the same standard as SNP6VDX7C/8G, AA937595 listed on Dell's official website.
This memory is backward compatible and can also be used in DDR4-2666/PC4-21300, DDR4-2400/PC4-19200, and DDR4-2133/PC4-17000 notebooks. Can be added to Dell's Inspiron, Latitude, Alienware, OptiPlex (notebook), Precision (notebook), and Vostro (notebook).
*Not compatible with all DELL laptops. Please check the list of compatible models at the bottom of the product page for compatible models and model numbers.Product description
Memory for DELL laptop expansion.SO-DIMM to upgrade Dell memory. Can be added to Dell's Inspiron, Latitude, Alienware, OptiPlex (notebook), Precision (notebook), and Vostro (notebook).
The list of compatible models below are Dell notebook PCs that can be expanded with DDR4-3200 memory, but even if the model number is the same, the maximum installed memory may be limited due to differences in CPU. If you have any questions, please contact the seller (Rank Up LLC).
This memory is backward compatible, so it also supports DDR4-2666/PC4-21300, DDR4-2400/PC4-19200, and DDR4-2133/PC4-17000.List of compatible models 1 (excerpt)
DELL Latitude Latitude 14 5000 series (5490), Latitude 14 5000 series (5491), Latitude 14 7000 series (7400), Latitude 14 7000 series (7410), Latitude 14 7000 series (7480), Latitude 14 7000 series (7490), Latitude 15 3000 series (3500), Latitude 15 3000 series (3510)
Removing the display bezel
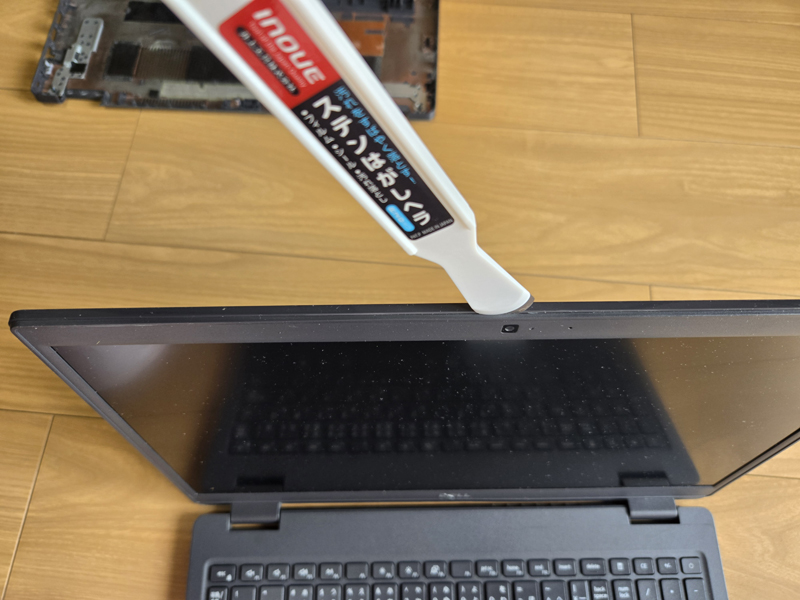
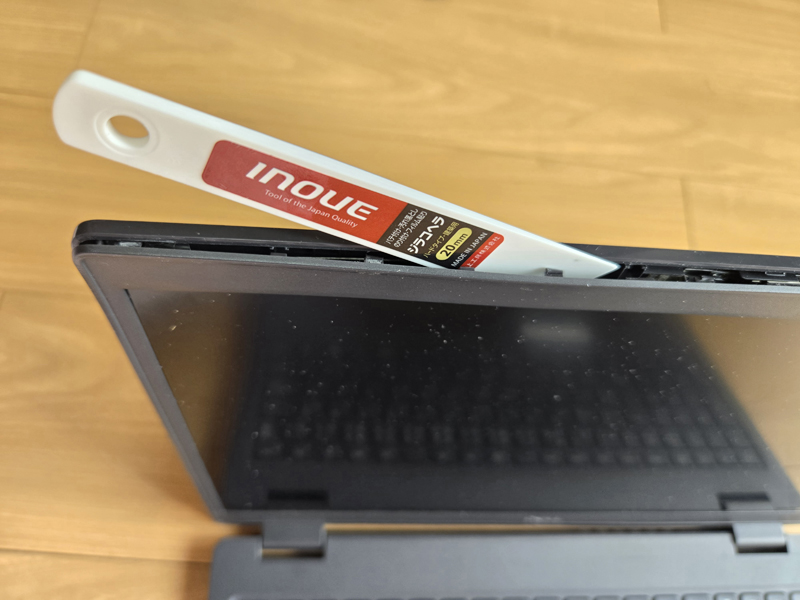
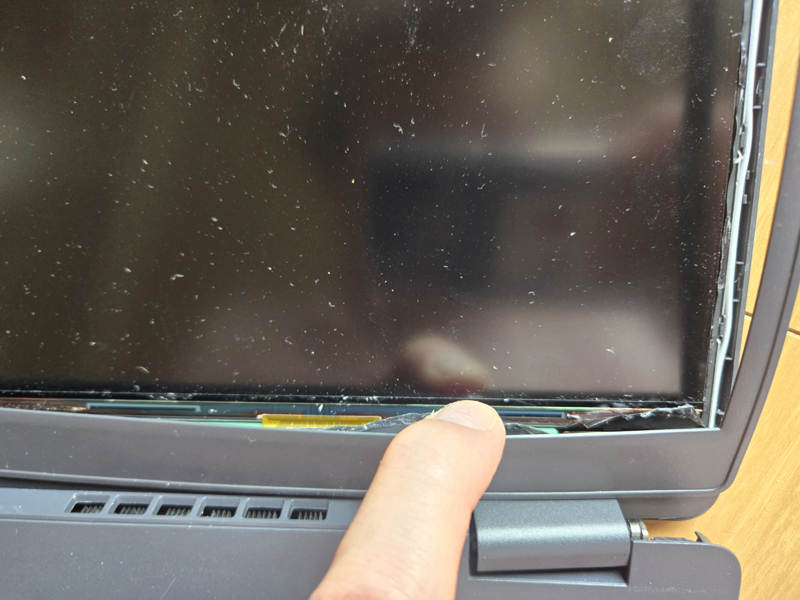
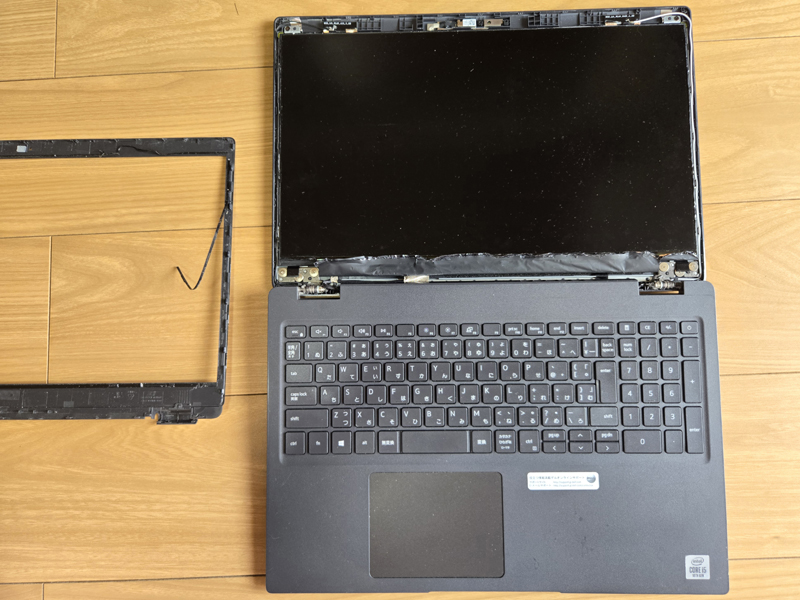
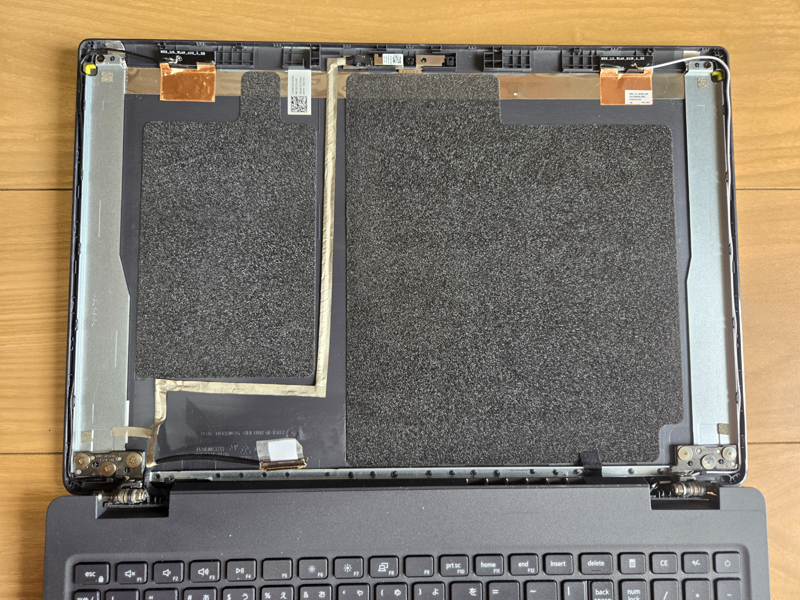
This model has a thin display bezel with almost no gaps, so use a stainless steel peeler. Once the spatula gets into the gap, switch to the Jirako spatula and carefully peel off the bezel.
When reusing the display, be careful not to damage the LCD panel with the spatula.
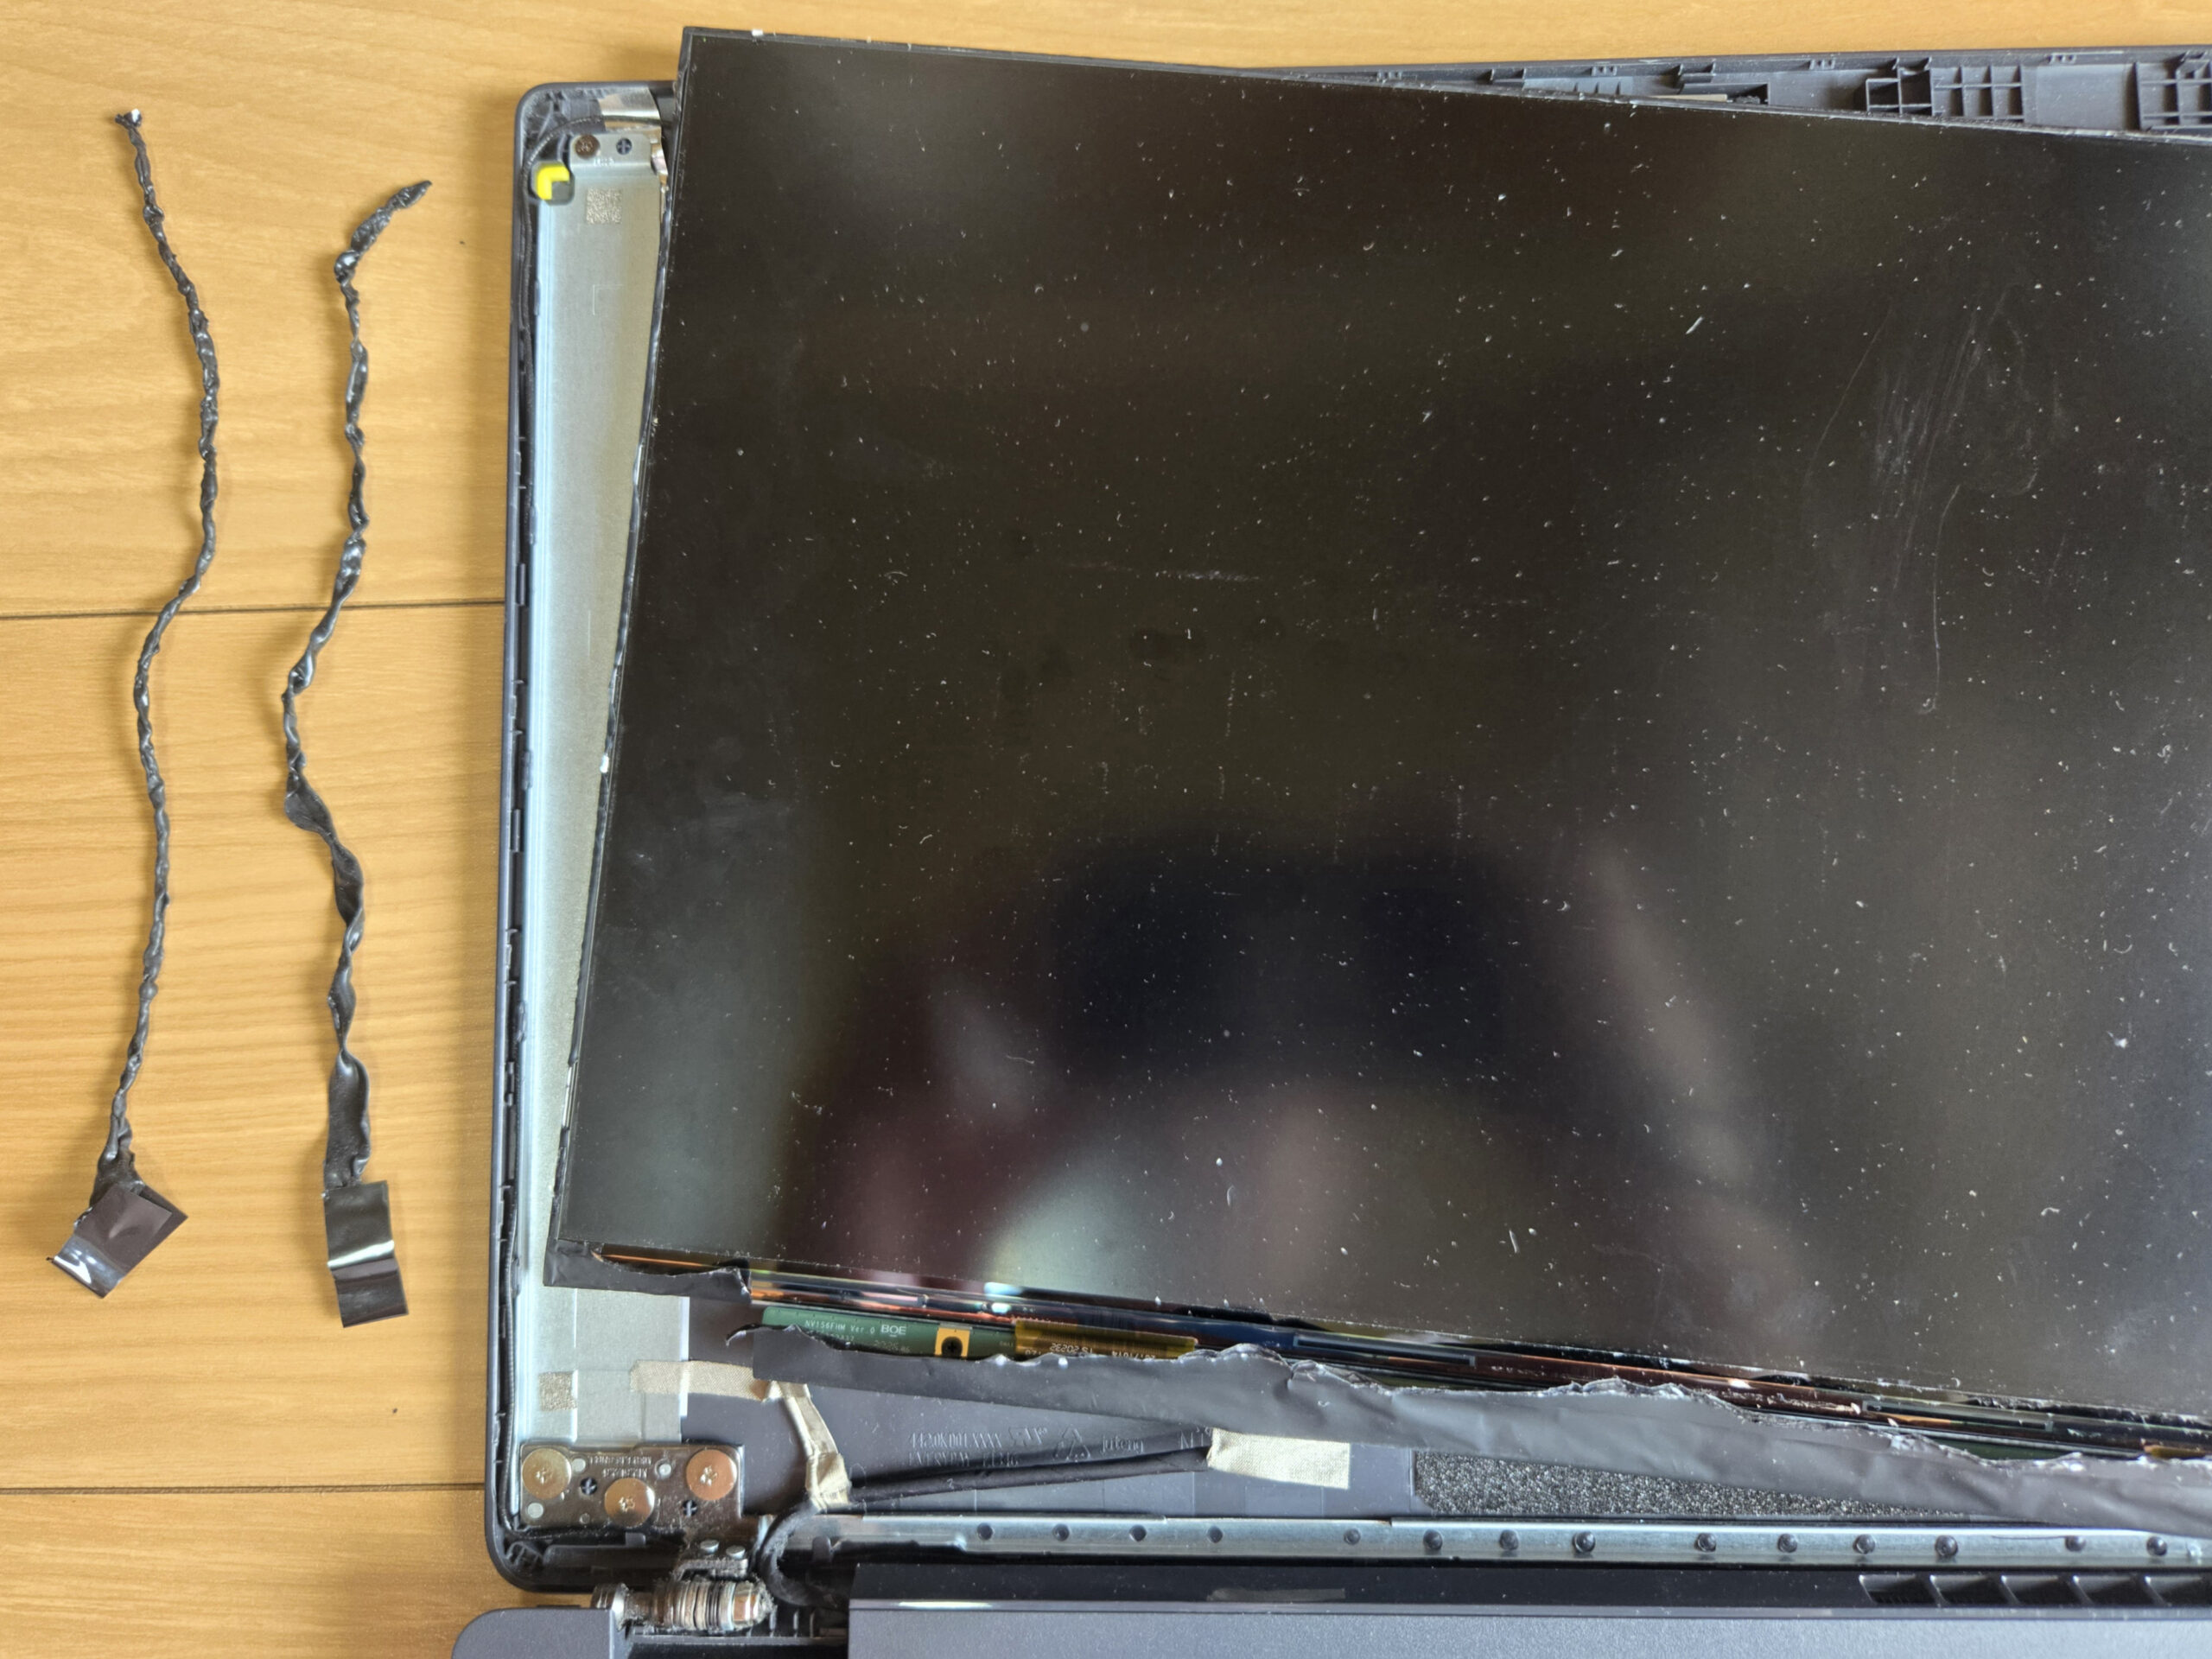
Removing the LCD panel
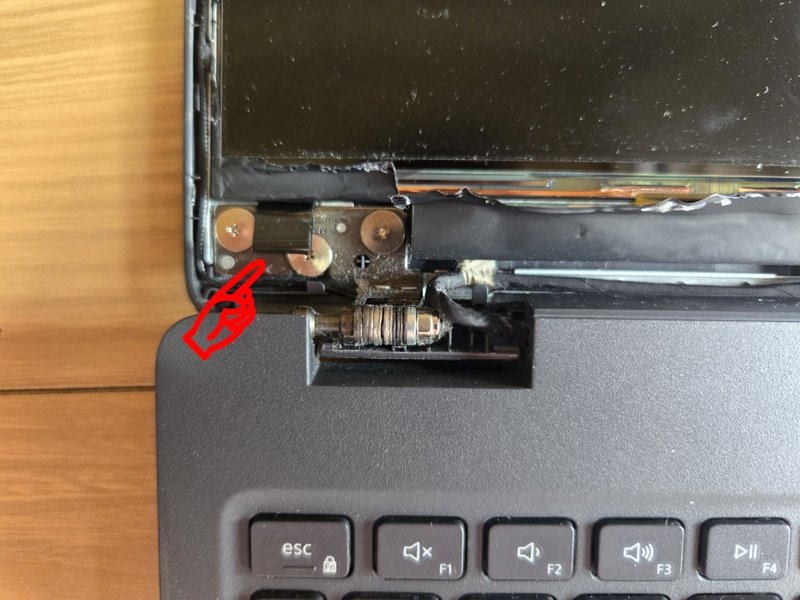
Pull out the double-sided tape protruding from the bottom of the left and right sides of the LCD panel. Perform this on both the left and right sides. When you remove this double-sided tape, the LCD panel will come off at the same time.
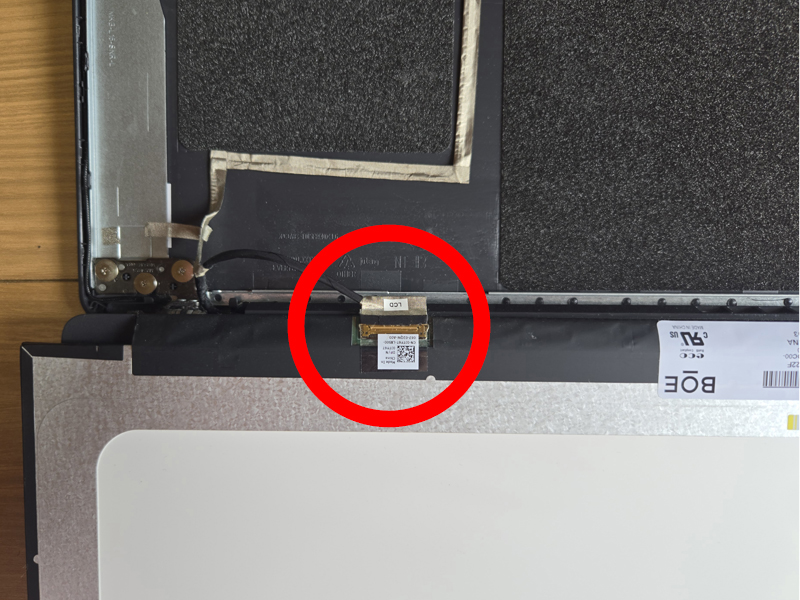
LCD panel cable removal
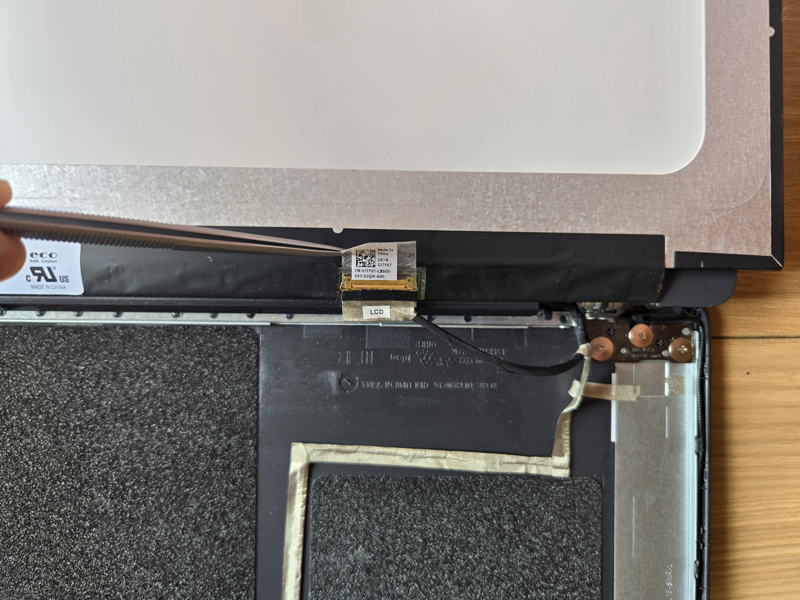
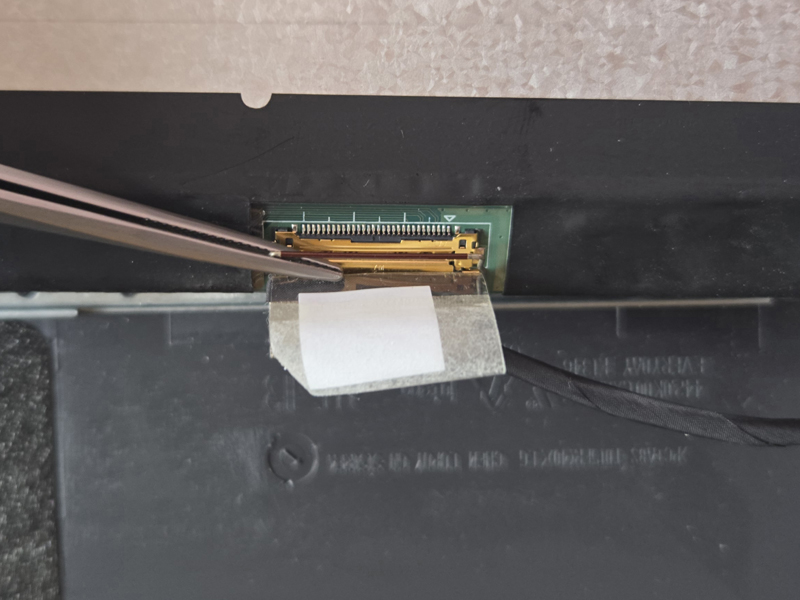
Disconnect the cable connector circled in red. The connector is covered with an insulating cover and locked, so peel off the insulating cover, then use tweezers to release the lock and pull out the connector.
Preparing a replacement LCD panel

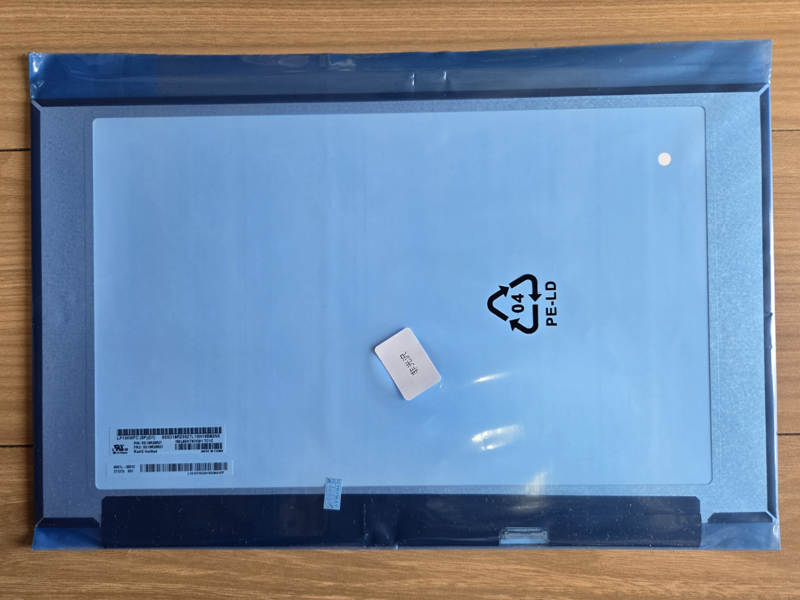
I prepared the following LCD panel purchased from Yahoo! Auctions. Please note that this LCD panel does not have screw holes for mounting. The LCD panel of the Latitude 15 3510 (P101F) is compatible with both types with and without screw holes.
Domestic shipping 1-2 days arrival DELL Latitude 15 3000 Series 3510 P101F LCD panel Wide viewing angle Full HD 1920×1080 Non-touch compatible
[Product condition]
※Brand new
【Product Specifications】
Size: 15.6 inches
Resolution: FHD (1920×1080)
Backlight technology: WLED
*Choose non-glare panel type
[Compatible model number]
Latitude 3510 P101F
Cannot be used on models with a resolution of 1366 x 768 and touch models.
Installing the replacement LCD panel
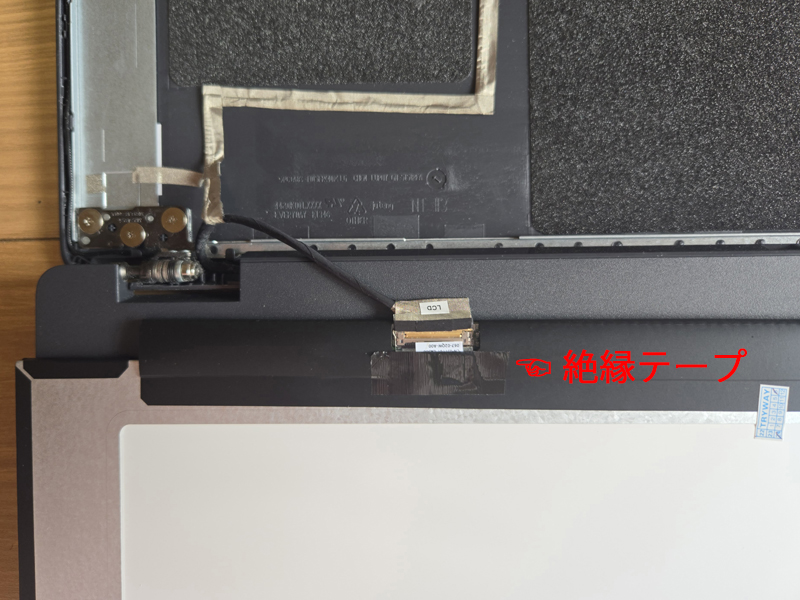
After connecting the LCD panel cable connector to the replacement LCD panel connector, apply new insulating tape (black) over the transparent insulating tape to secure it in place.
The cable for the LCD panel should be hooked to the metal claw at the left end of the cable facility groove (red line) at the bottom, and then laid along the groove. If a claw sticks out toward you when disassembling it, use a flathead screwdriver to press it down firmly to crush the protrusion. If there is a protrusion, the left side of the bottom edge of the bezel will not stick properly.
Also, the two parts on the back of the bezel hinge are joined with nails, so turn the main body over and press it with your hands to secure it firmly.
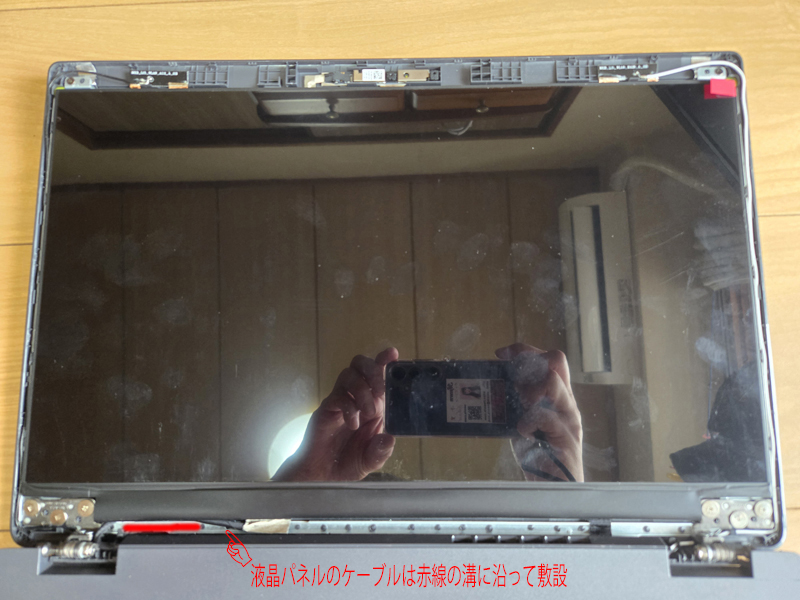
(Non-glare if you remove the protective sheet)
Operation test
Before assembling, check the operation by supplying power from the AC adapter. Currently, 8MB of memory has been added to 8MB, so it is OK if the installed RAM can be recognized as 16GB.
After testing, remove the display's protective sheet and attach the display bezel.
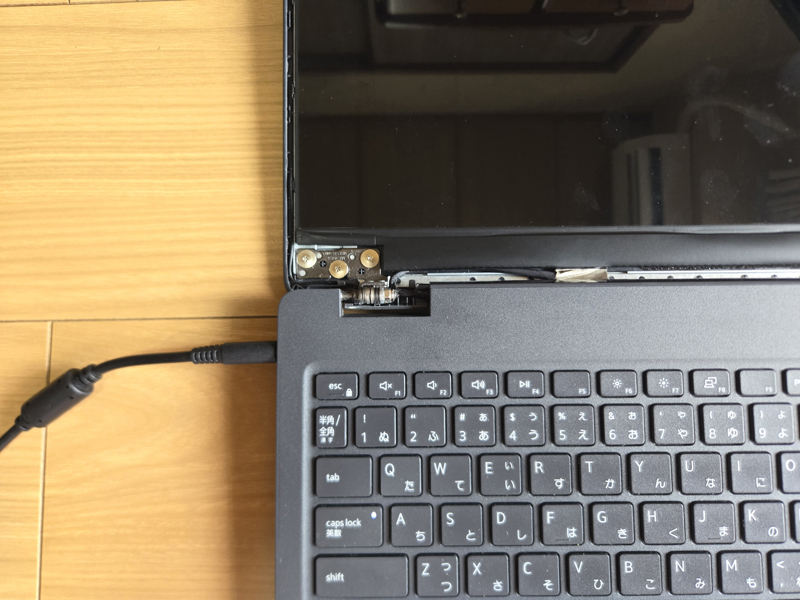
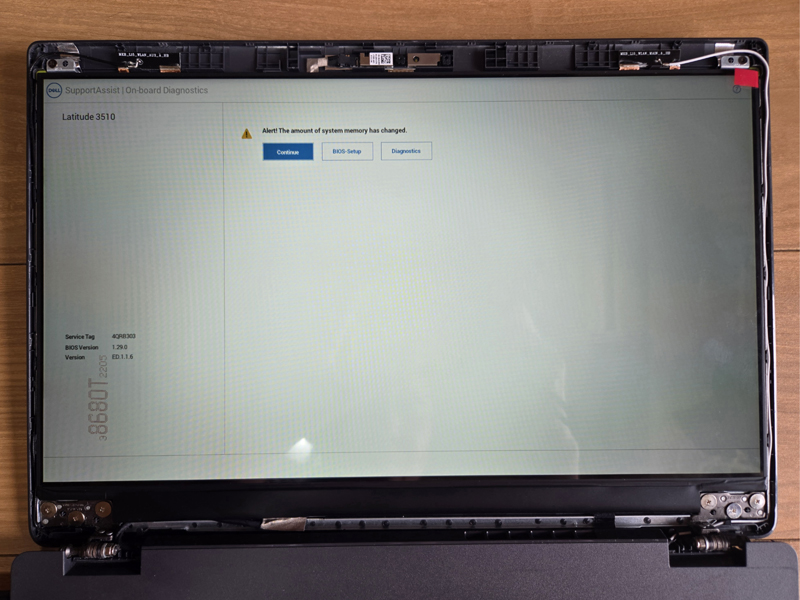
Press [enter] without going through BIOS Setup
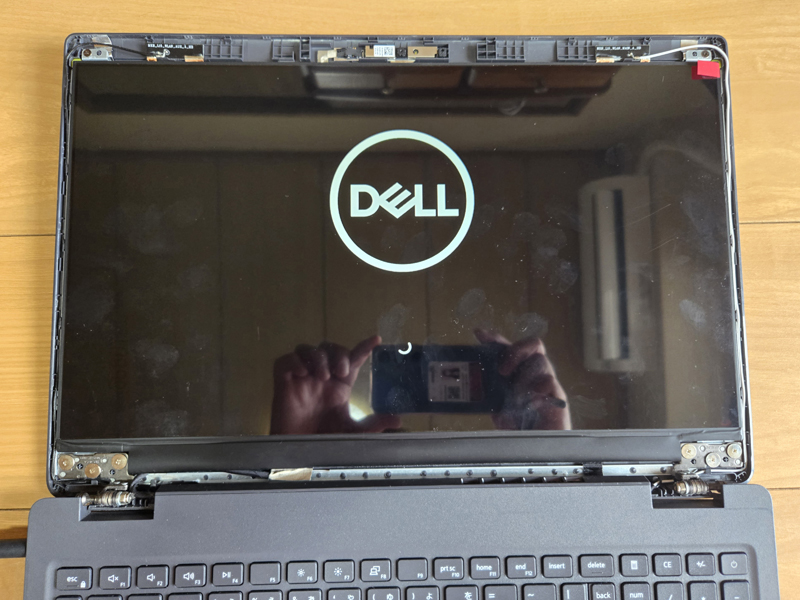
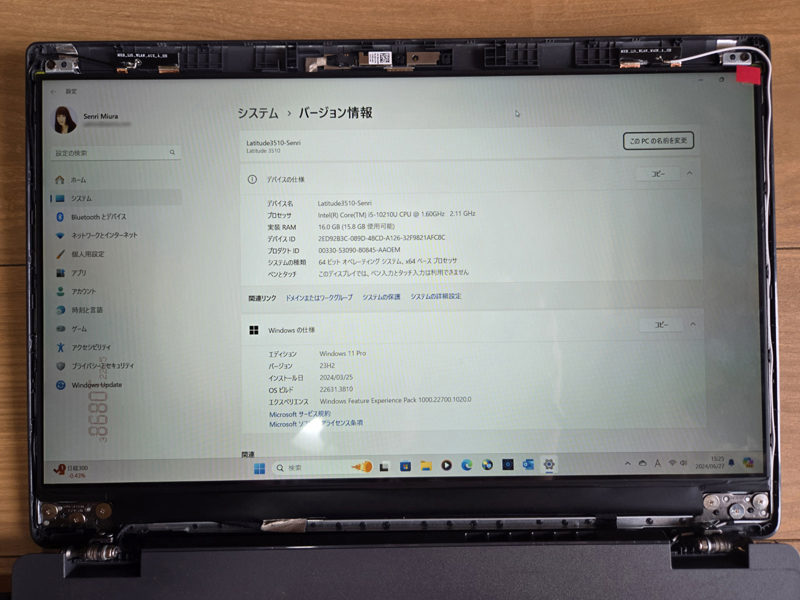
Installing the display bezel
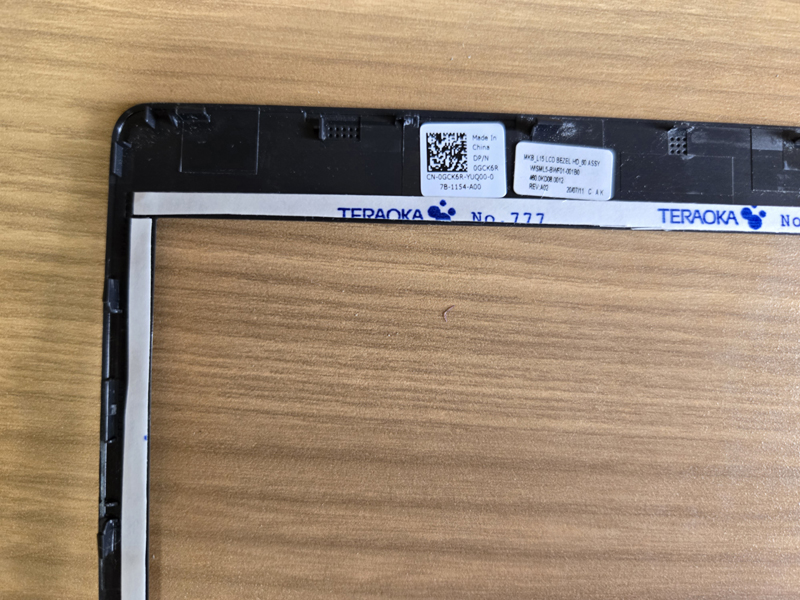
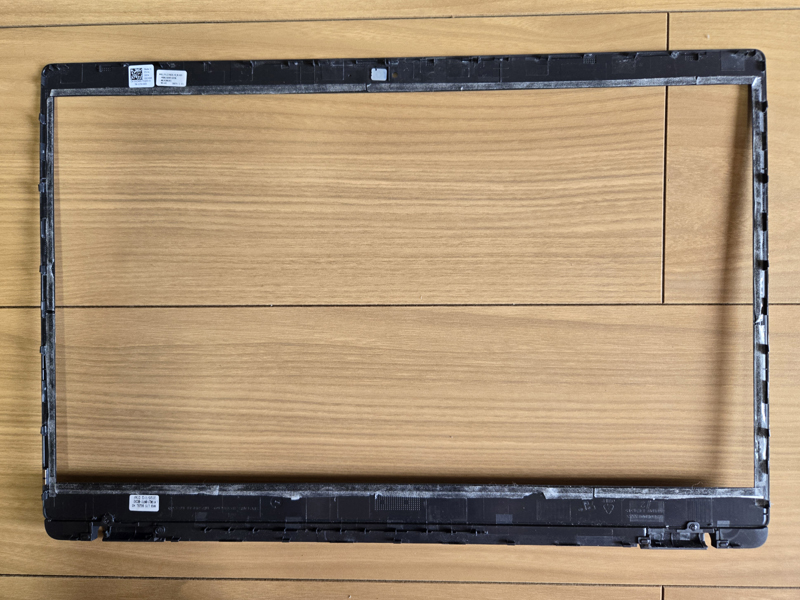
The double-sided tape on the display bezel is useless once removed, so remove all double-sided tape that is stuck halfway. After removing it, apply new double-sided tape (black double-sided tape with a width of 3 mm) along the inside of the bezel frame.
Peel off the protective sheet on the replacement LCD panel and attach the display bezel.
When you install the display bezel in the process of "Applying new double-sided tape (1-2)" below, the adhesive tape at the bottom edge of the bezel will stick to the masking cellophane (black) of the LED backlight of the display, so you will have to peel off the bezel. To be on the safe side, you may want to extend the tip of the double-sided tape to the outside of the display bezel without removing it, so that you can remove the tape from the outside after final confirmation.
In this example, transparent double-sided tape is used, but as mentioned above, we recommend double-sided tape (black) for LED screen repair with a width of 3 mm.
If pasting fails and you need to re-stick the bezel, completely peel off the peeled-off LED backlight masking cellophane at the bottom of the LED, then apply two rows (6 mm) of double-sided tape (black) for LED screen repair with a width of 3 mm. Width) and reupholster.
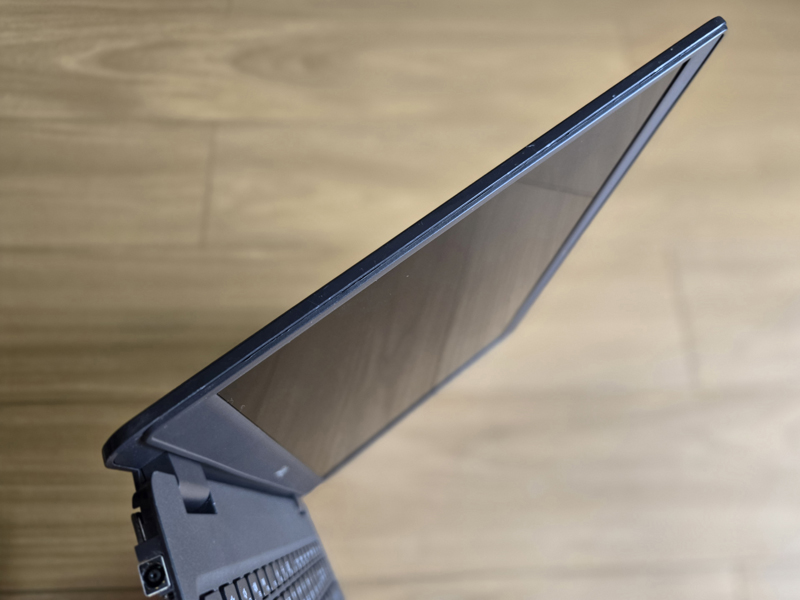
The trick to attaching the bezel is to slowly and carefully attach the bezel while making sure that the width of the black edge of the screen at the four corners is even. Therefore, the screen should be in a display state when pasting.
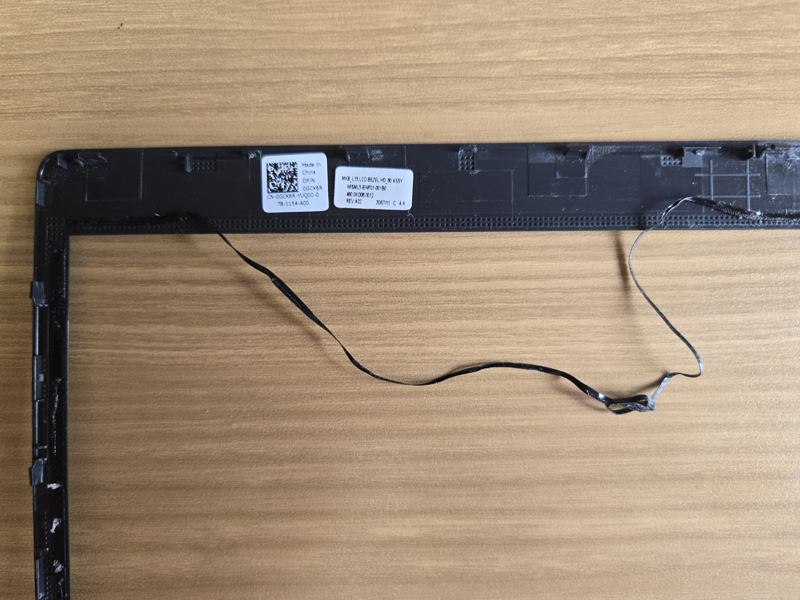
Installing the battery and base cover
After installing the display bezel, connect the battery cable connector inside the main unit, and then install the base cover.
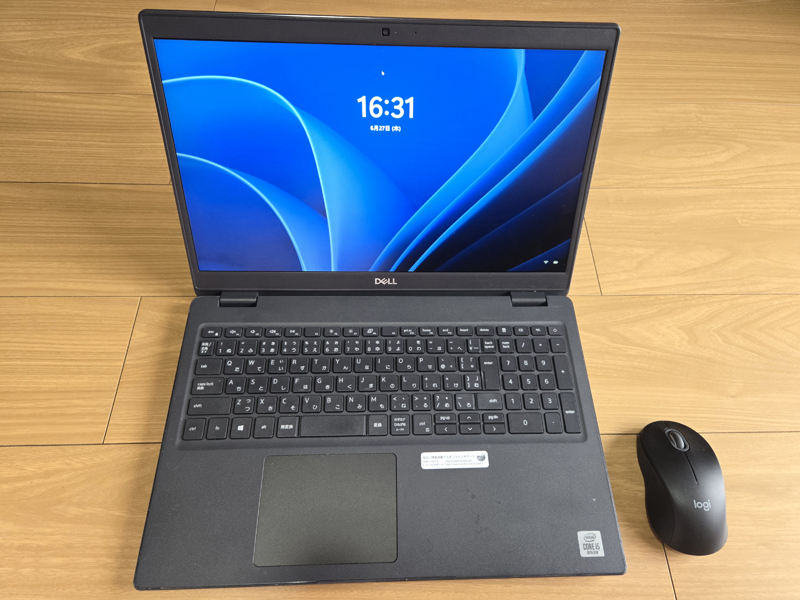
For the final test, press the power button to power on the battery and confirm that the battery status is normal.
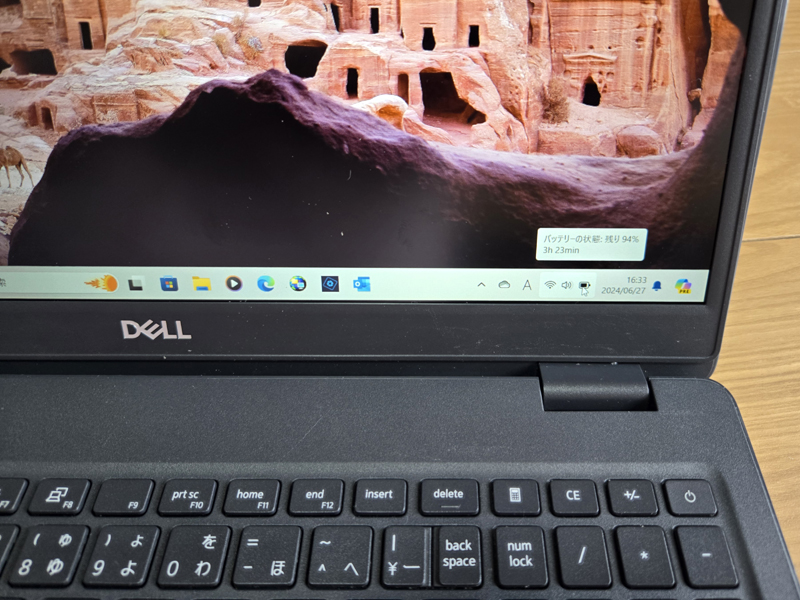
Microsoft Office 2021 Professional Plus Installation (reference)
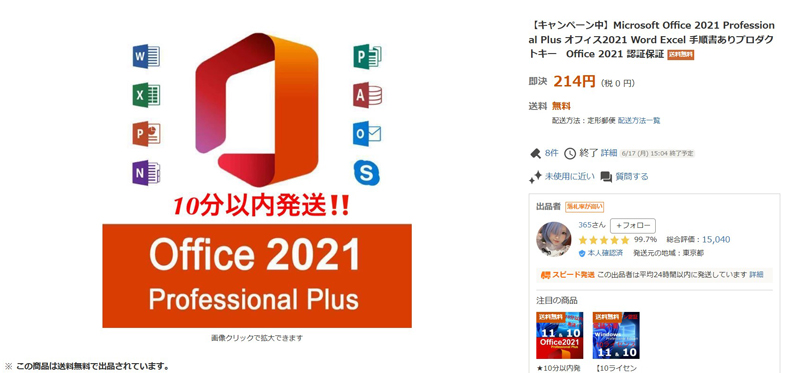
For reference, I purchased the product key for Microsoft Office 2021 Professional Plus from Yahoo! Auctions for 214 yen and installed Office 2021 on this machine. I had to authenticate by phone, but the authentication passed successfully!
The outline of this product is as follows.
Product Description
★Campaign in progress★One Office2021 item will be added for every +200 yen in shipping costs!
We will be able to guide you at a cheaper price than purchasing from 1 listing!If added, please let us know in the transaction message that you would like ○ pieces for ○○○ yen!
We will inform you right away! !This is a "product key" issued by Microsoft. 32-bit/64-bit Internet authentication or phone authentication is possible.
*Please rest assured that this product is not a fraudulent product that evades authentication.
*This is not a monthly subscription version, and can be used permanently without any additional costs.
*After license authentication, you can use it with your own Microsoft account.
・One product key will authenticate one PC.Compatible OS: Windows10/Windows11
Compatible with both 32bit/64bit
Supported language Japanese*Only the product key (license key) is listed.
*This is a "regular product key" issued by Microsoft.
*Online verification or telephone verification will be required. If you require phone authentication, we will do the phone authentication on your behalf. Even those who are not familiar with computers can easily install it.
*If authentication is not possible, we will replace the product key free of charge. In the case of phone authentication, authentication will be performed instead.
*If you have already installed the software, you can obtain authentication by simply changing the product key.After authentication is complete, you can use it without any restrictions as long as there are no changes to your PC configuration.
[Latest in 2024] Yahoo! Auction - List of used, new, and unused Microsoft Office 2021 product keys
Application content
-Microsoft Office Word 2021
-Microsoft Office Excel 2021
-Microsoft Office PowerPoint 2021
-Microsoft Office OneNote 2021
-Microsoft Office Outlook 2021
-Microsoft Office Access 2021
-Microsoft Office Publisher 2021
Response time
11:00~23:00
Product shipping:
As soon as your payment is confirmed, we will send you a "product key" through transaction navigation.
*As the item will be delivered via transaction navigation, the actual item will not be shipped.
*Please rest assured that we will support you from issue to completion of certification.

